OIDC 인증 - auth0 기반
개인이 auth0를 활용하여 쉽게 OIDC 기반 소셜 로그인을 구성하는 방법
auth0 회원가입
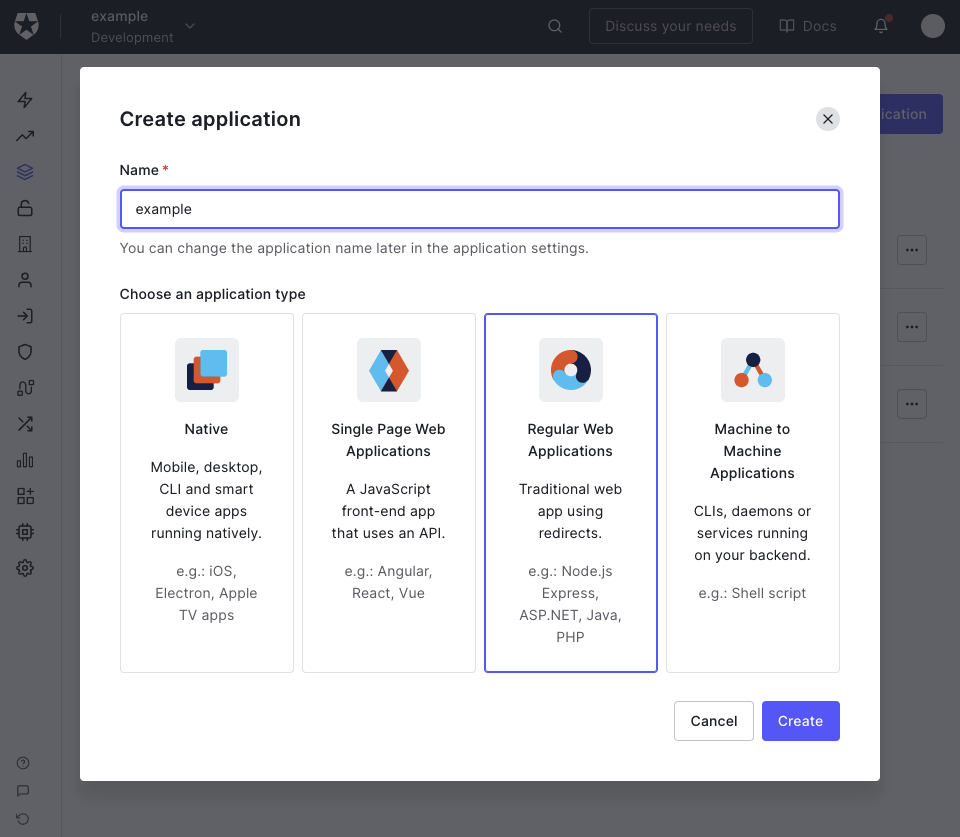
어플리케이션 생성
auth0 → Applications → Create Application → Regular Web App 선택 → Apache 선택
연동 IdP 관리
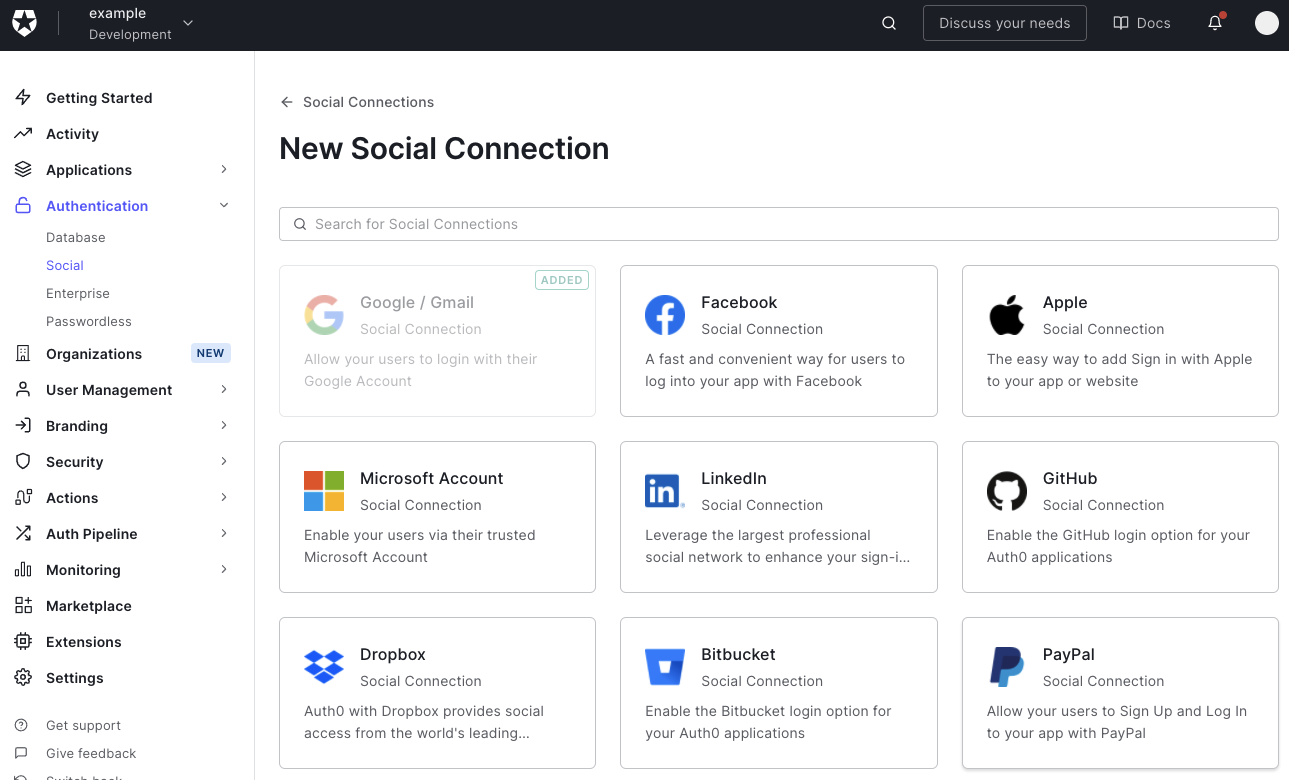
auth0 → Authentication → Social → 원하는 소셜 로그인 등록
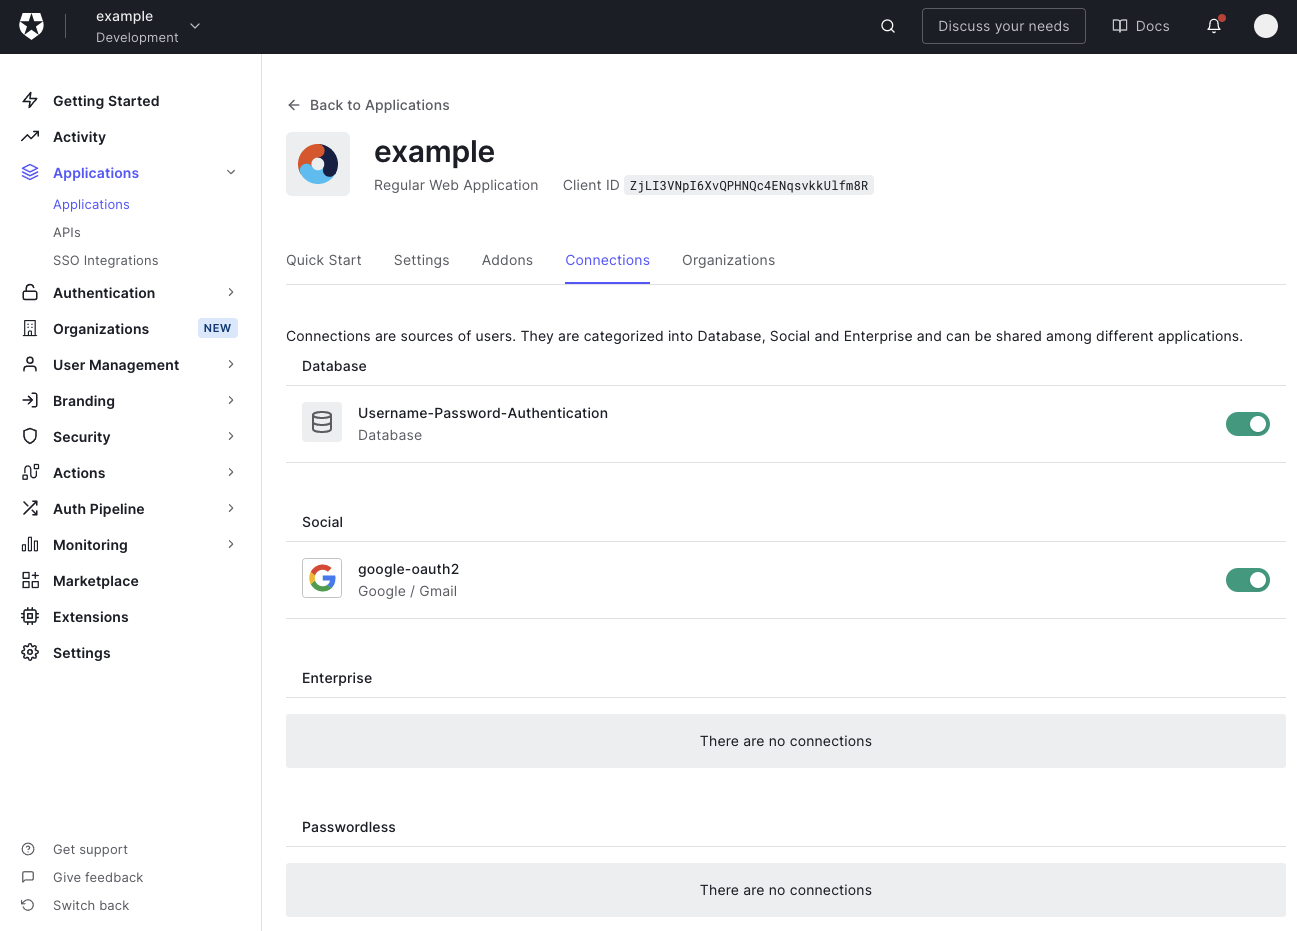
auth0 → Applications → 생성한 어플리케이션 → Connections → 원하는 소셜 로그인 활성화
URI 설정
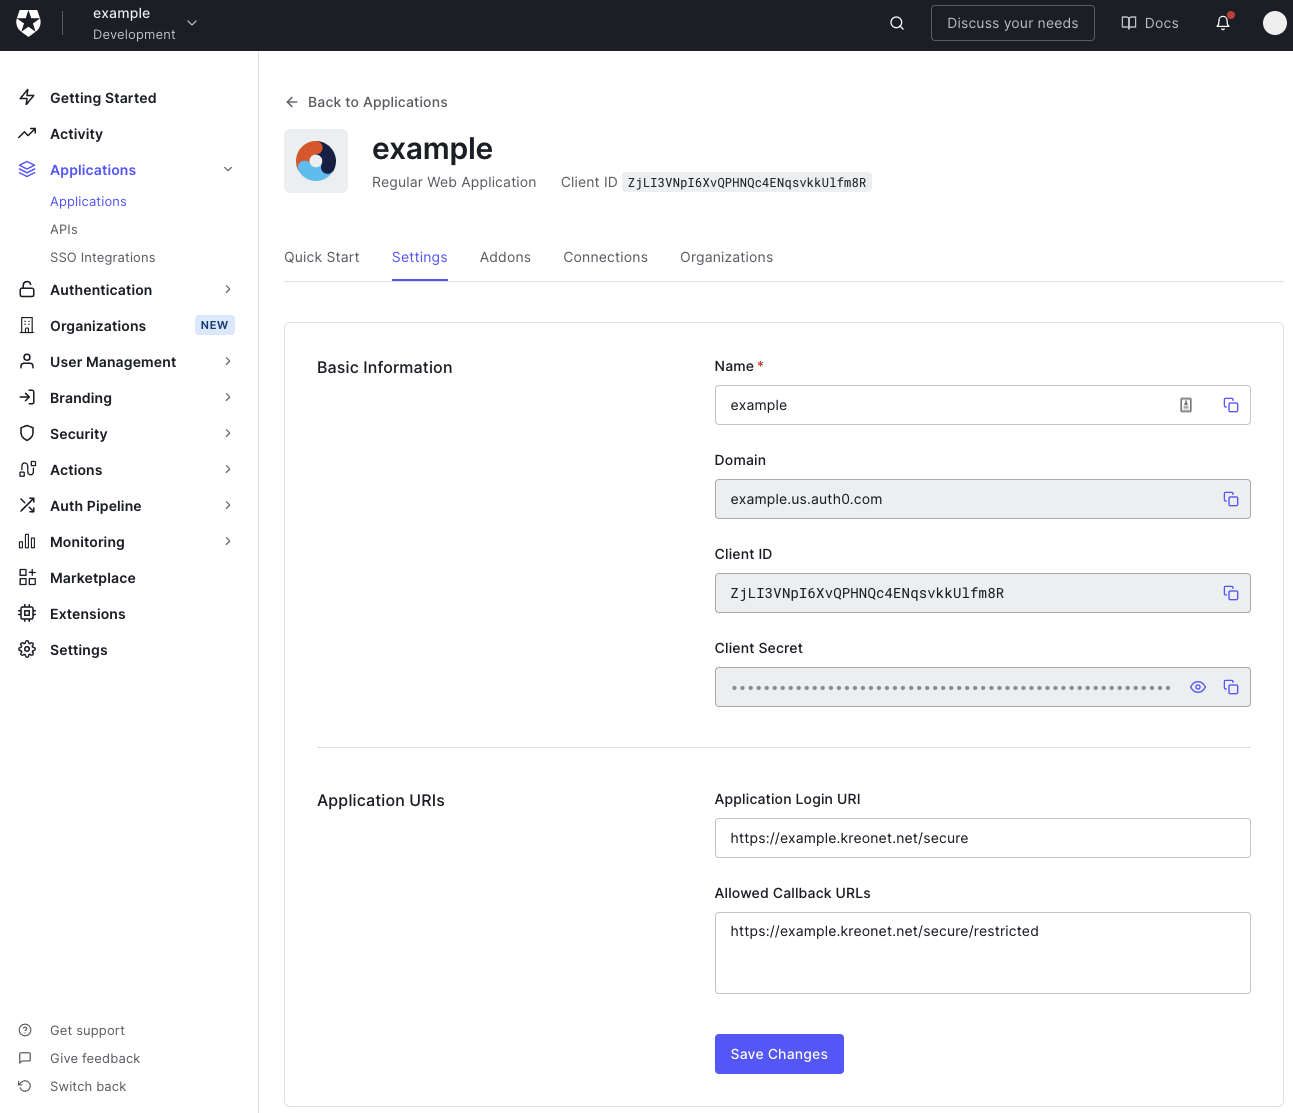
auth0 → Applications → 생성한 어플리케이션 → Settings
URI 설정
- Login URI : https://example.kreonet.net/secure
- Callback URLs : https://example.kreonet.net/secure/restricted
Client Secret 은 메모장에 복사해둔다
아파치 설정
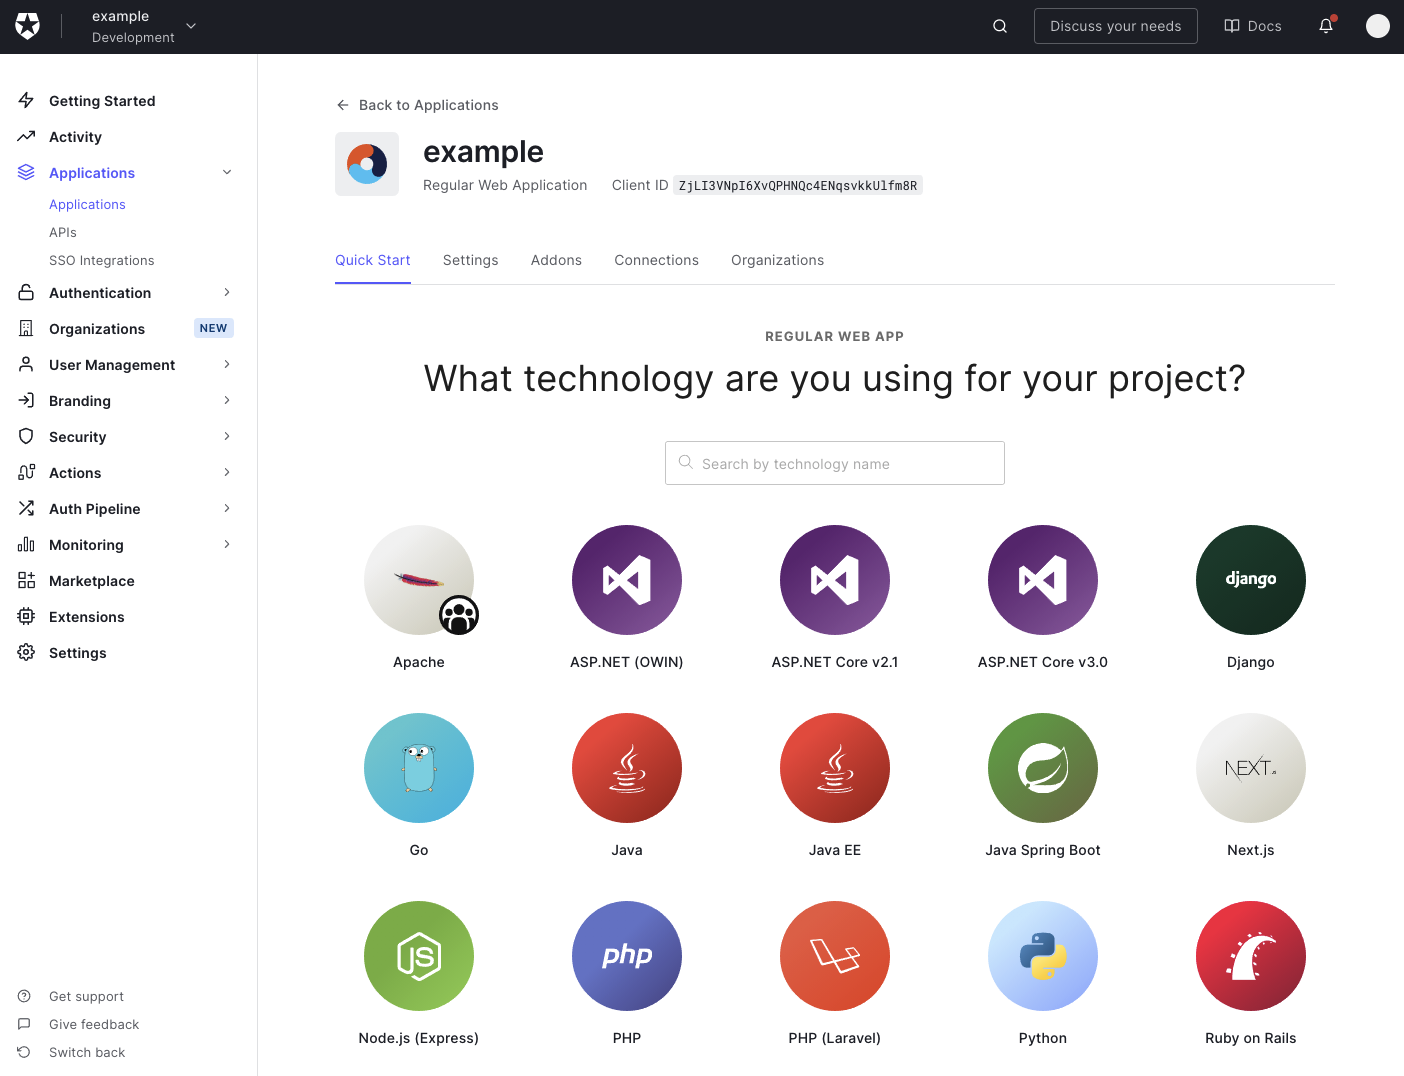
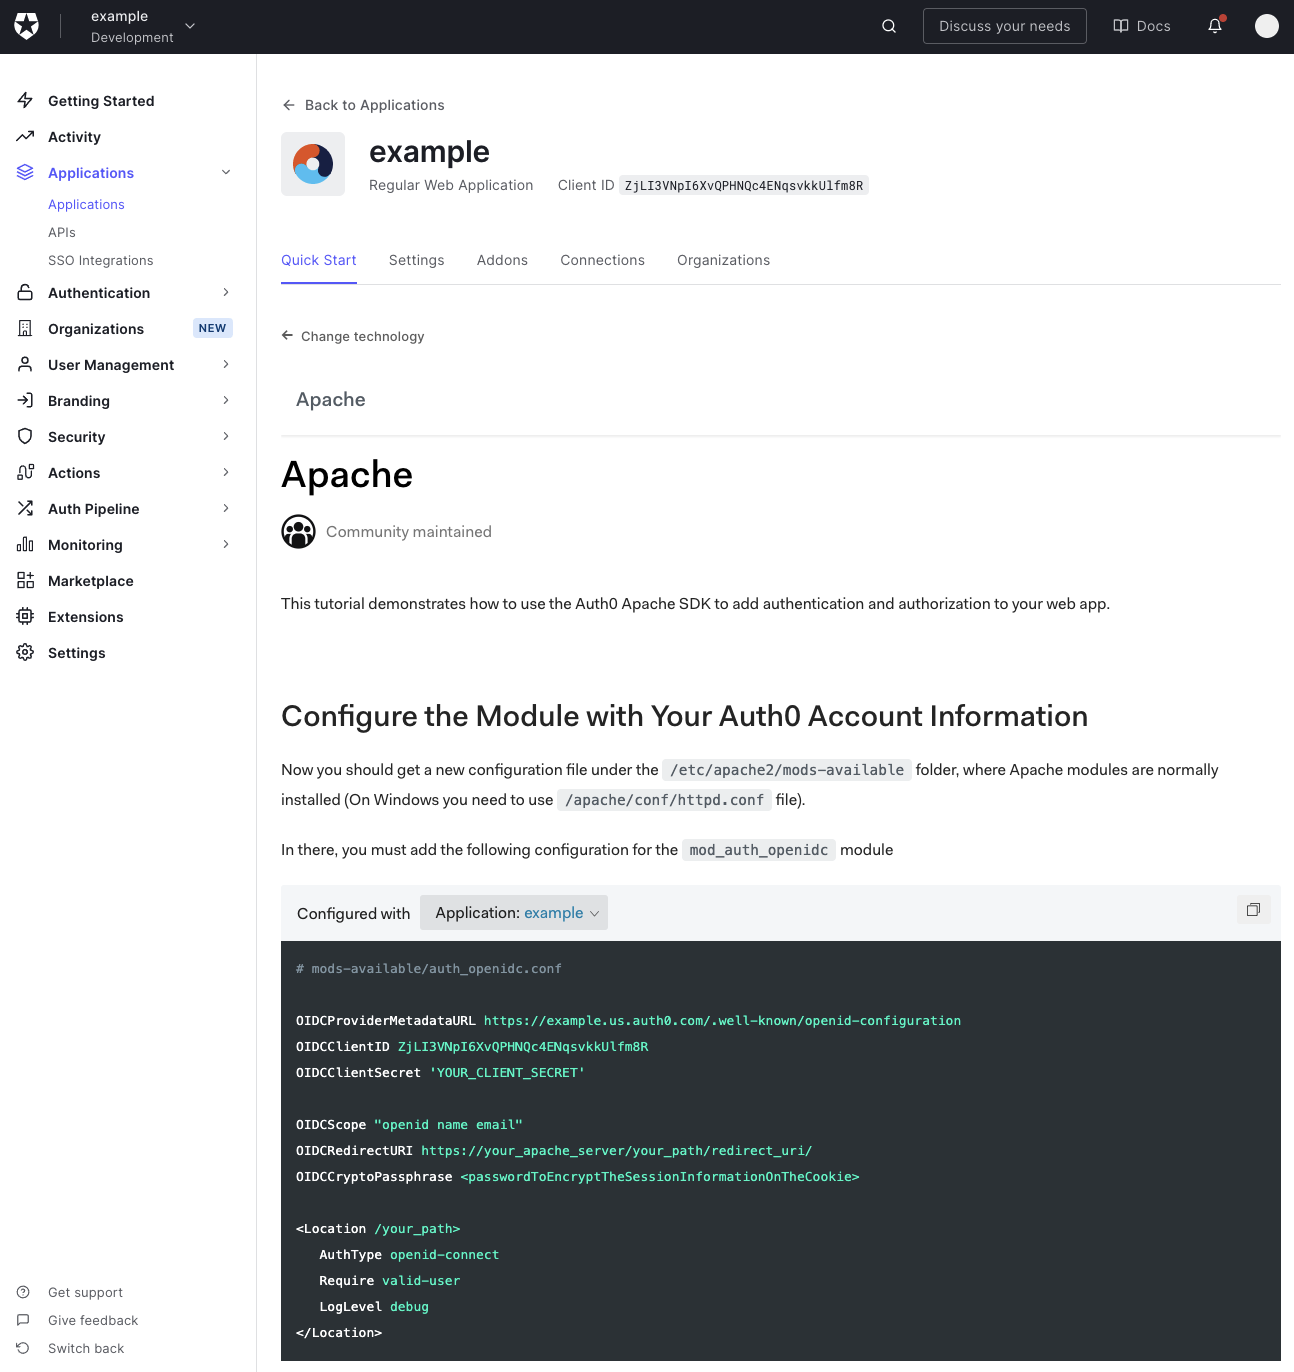
auth0 → Applications → 생성한 어플리케이션 → Quick Start 에 기반하여 설정
- 설정을 메모장에 복사
- YOUR_CLIENT_SECRET : 위에서 복사해 둔 Client Secret
- OIDCCryptoPassphrase : 임의의 영문+숫자 문자열, HEX 난수발생기로 생성
- OIDCRedirectURI : 위에서 입력한 Callback URL 중 하나를 입력
- Location : 위에서 입력한 Login URL 과 대응되도록 설정
다음은 예제에 적용한 설정이다.
<VirtualHost *:443>
    ServerName example.kreonet.net
    Use RotateLogs example.kreonet.net
    #...
    Include conf.d/ssl-kreonet.cnf

    OIDCProviderMetadataURL https://example.us.auth0.com/.well-known/openid-configuration
    OIDCClientID ZjLI3VNpI6XvQPHNQc4ENqsvkkUlfm8R
    OIDCClientSecret 'YOUR_CLIENT_SECRET'

    OIDCScope "openid name email"
    OIDCRedirectURI https://example.kreonet.net/secure/redirected
    OIDCCryptoPassphrase <passwordToEncryptTheSessionInformationOnTheCookie>

    <Location /secure>
       AuthType openid-connect
       Require valid-user
       LogLevel debug
    </Location>
</VirtualHost>
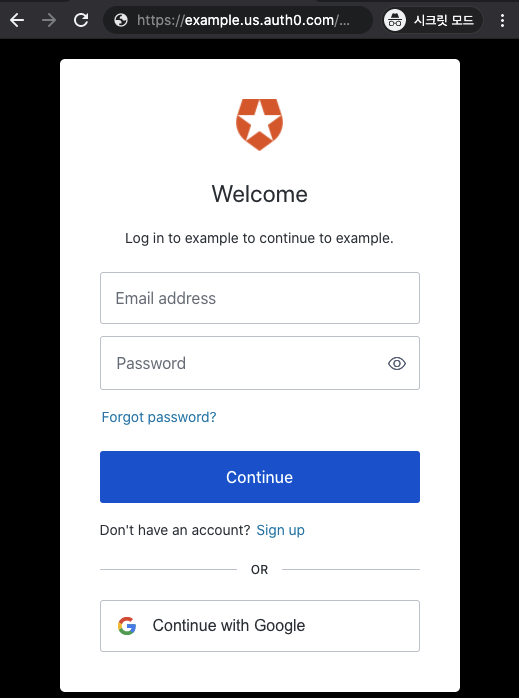
웹사이트 접속
아파치 웹서버를 재시동 하고 https://example.kreonet.net/secure 에 접속하면 auth0 사이트의 로그인으로 redirect 된다.
로그인이 완료되면 redirected 본래의 웹사이트로 redirect 된다.
PHP를 통해 SERVER 변수를 읽으면 OIDC 세션을 확인할 수 있다. 해당 세션을 날리면 로그아웃 된다.

<html>
<head>
  <meta charset="utf-8">
  <title>OpenID Connect: Received Claims</title>
</head>
<body>
  <h3>Claims sent back from OpenID Connect via the Apache module</h3>
  <?php session_start(); ?>
  <h2>Claims</h2>
  <div class="row">
    <table class="table" style="width:80%;" border="1">
      <?php foreach ($_SERVER as $key=>$value): ?>
      <?php if ( preg_match("/OIDC_/i", $key) ): ?>
        <tr>
        <td data-toggle="tooltip" title=<?php echo $key; ?>><?php echo $key; ?></td>
        <td data-toggle="tooltip" title=<?php echo $value; ?>><?php echo $value; ?></td>
        </tr>
      <?php endif; ?>
      <?php endforeach; ?>
  </table>
</body>
</html>
제약조건 걸기
OIDC configuration 에서 쓸만한 속성을 찾는다. Apache 웹서버에 scope 를 통해 적절한 것들을 요청하면 claim 으로 반환한다.
{
//...
"scopes_supported":["openid","profile","offline_access","name","given_name","family_name",
    "nickname","email","email_verified","picture","created_at","identities","phone","address"],
//...
"claims_supported":["aud","auth_time","created_at","email","email_verified","exp",
    "family_name","given_name","iat","identities","iss","name","nickname","phone_number","picture","sub"]
//...
}
이 claim 들을 apache 설정의 변수로 하여 접근제한의 제약조건을 설정할 수 있다.
    <Location /secure>
       AuthType openid-connect
       Require claim sub:<userid>
       LogLevel debug
    </Location>
참고
Apache OpenIDC 모듈의 위키 페이지, https://github.com/zmartzone/mod_auth_openidc/wiki
OIDC log sample of Apache HTTPD, https://community.broadcom.com/communities/community-home/digestviewer/viewthread?MID=798871
A Basic Globus Login for Apache Websites, https://www.globus.org/blog/basic-globus-login-apache-websites
mod_auth_openidc how to access user variables for use in PHP, https://stackoverflow.com/questions/39352702