Overview
Purpose (KR)
100GbE PS와 10GbE PS를 하나의 머신에서 운영
PS(perfSONAR) 운영시 대역폭 테스트 머신과 지연(latency) 테스트 머신을 분리하는 것이 좋음
100GbE 머신에서 지연(latency) 테스트 머신을 VM으로 운영
Purpose (EN)
Operate 100GbE PS and 10GbE PS on same baremetal server
Highly recommended to split throughput and latency test machine
Launch latency test machine as VM on throughput test machine
Host ( 100G perfSONAR + VM Host )
| Vendor | Supermicro | |
|---|---|---|
| Model | 6028r | |
| CPU | Intel Xeon E5-2643 v4 @ 3.40GHz | 6C 12T x 2ea |
| MEM | DDR4 128GB | |
| NIC1 | Intel 10GbE dual port | |
| NIC2 | Mellanox ConnectX-5 100GbE single port | |
| Hostname | ps-amst.kreonet2.net | |
| OS | CentOS 7.9.2009 | |
| perfSONAR | 4.4.4-1.el7 |
VM Guest ( 10G perfSONAR )
| CPU | host-passthrough | vCPU : 4C |
|---|---|---|
| MEM | DDR4 16GB | |
| NIC1 | pci-passthrogh | Intel 10GbE single port |
| Hostname | ps-amst-v1.kreonet2.net | |
| OS | CentOS 7.9.2009 | |
| perfSONAR | 4.4.4-1.el7 |
Install utils and cockpit-machines
# sudo yum -y install tmux tree git zsh sqlite net-tools ipmitool lshw inxi htop hwloc-gui

# sudo yum -y install cockpit cockpit-machines libosinfo qemu-kvm libvirt libvirt-python libguestfs-tools virt-install

# sudo firewall-cmd --add-service=cockpit
# sudo firewall-cmd --add-service=cockpit --permanent

# sudo systemctl enable --now cockpit.socket
Check Hardware
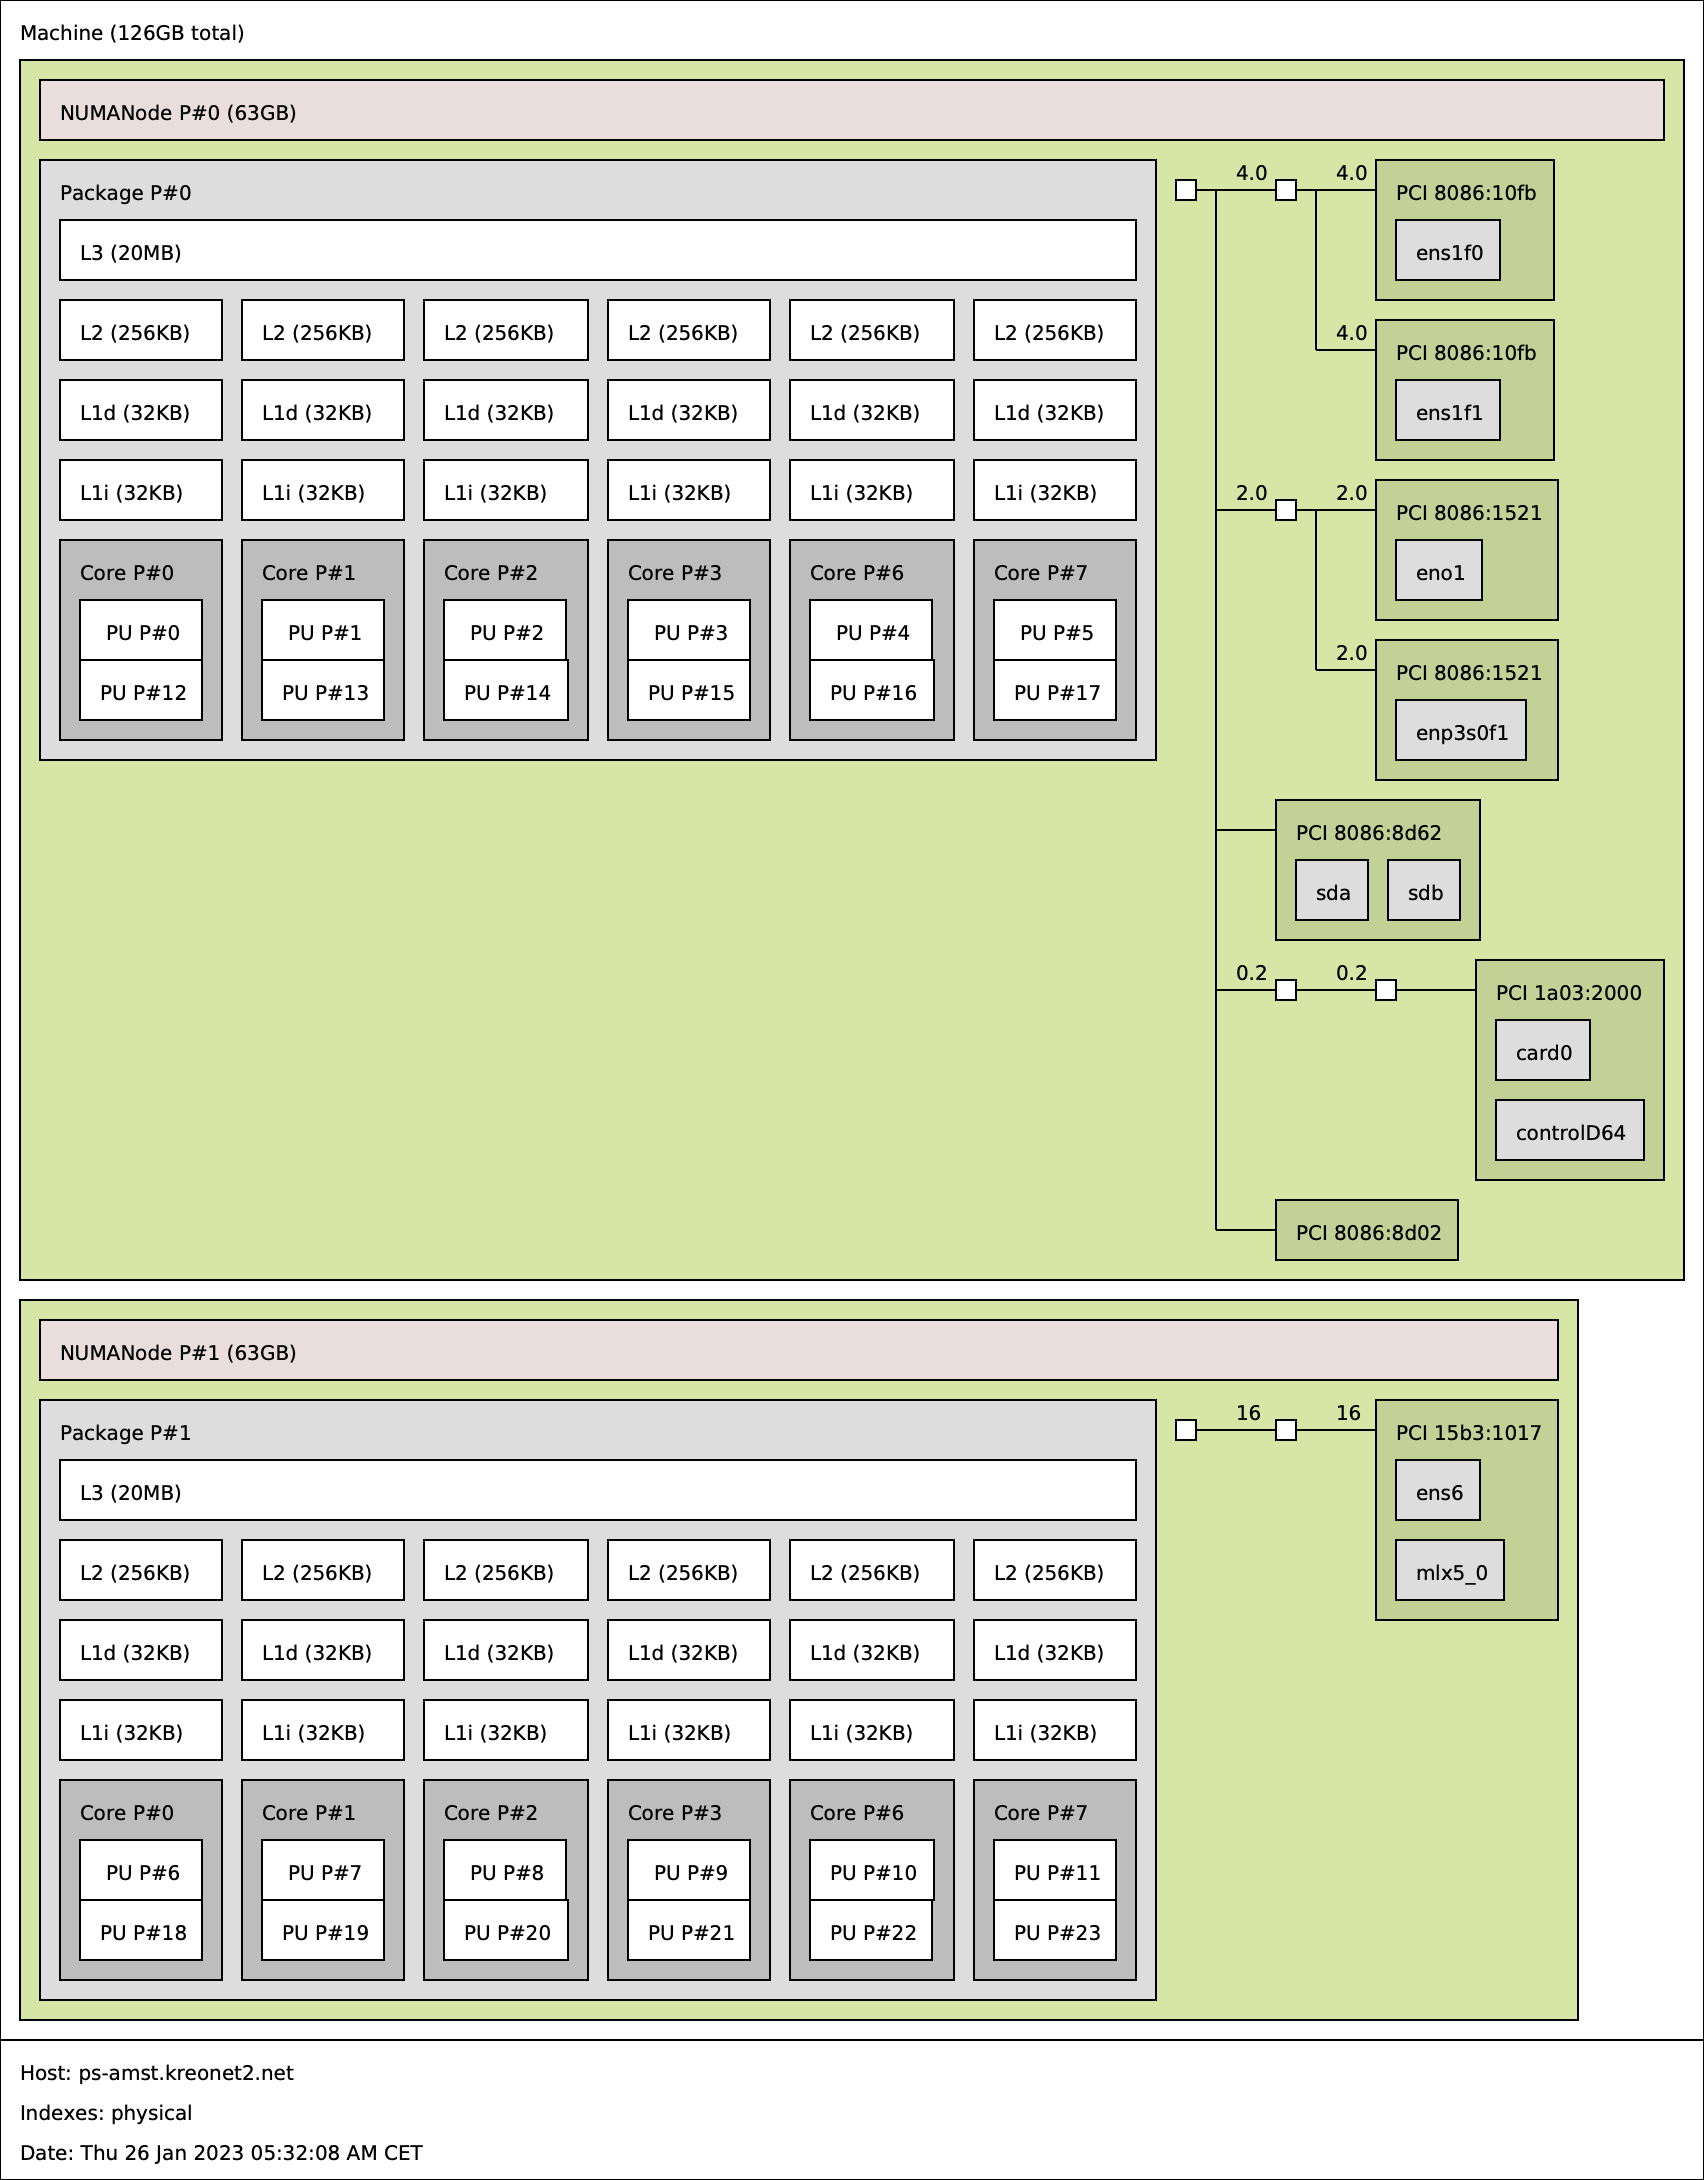
# lstopo --ignore misc hwconfig.png
# sudo lshw -short -c net
H/W path         Device      Class          Description
=======================================================
/0/100/1/0       ens1f0      network        82599ES 10-Gigabit SFI/SFP+ Network Connection
/0/100/1/0.1     ens1f1      network        82599ES 10-Gigabit SFI/SFP+ Network Connection
/0/2/0           ens6        network        MT27800 Family [ConnectX-5]

# sudo ls -al /sys/class/net/ens1f0/device/driver
/sys/class/net/ens1f0/device/driver -> ../../../../bus/pci/drivers/ixgbe

# sudo ls -al /sys/bus/pci/drivers/ixgbe
0000:01:00.0 -> ../../../../devices/pci0000:00/0000:00:01.0/0000:01:00.0
0000:01:00.1 -> ../../../../devices/pci0000:00/0000:00:01.0/0000:01:00.1
...
Unload NIC driver
/etc/systemd/system/sriov-vf.service
[Unit]
Description=Script to enable SR-IOV on boot

[Service]
Type=oneshot
ExecStart=/usr/bin/bash -c 'echo 0000:01:00.0 > /sys/bus/pci/drivers/ixgbe/unbind'
ExecStart=/usr/bin/bash -c 'echo 0000:01:00.1 > /sys/bus/pci/drivers/ixgbe/unbind'

[Install]
WantedBy=multi-user.target
# sudo ifconfig ens1f0 down
# sudo ifconfig ens1f1 down

# sudo systemctl daemon-reload
# sudo systemctl enable sriov-vf.service
# sudo systemctl start sriov-vf.service

# lshw -short -c net
H/W path         Device      Class          Description
=======================================================
/0/100/1/0                   network        82599ES 10-Gigabit SFI/SFP+ Network Connection
/0/100/1/0.1                 network        82599ES 10-Gigabit SFI/SFP+ Network Connection
/0/2/0           ens6        network        MT27800 Family [ConnectX-5]
Enable SR-IOV
2-1. SR-IOV config for Dell BIOS
2-2. SR-IOV config for AMI BIOS
3. SR-IOV config for Linux Kernel Boot
Launch VM
# scp ps-amst-v1.qcow2 root@HOST:/var/lib/libvirt/images
# scp ps-amst-v1.xml root@HOST:/var/lib/libvirt/images
# sudo virsh define ps-amst-v1.xml
# sudo virsh edit ps-amst-v1
# sudo virsh start ps-amst-v1
Etc

To do
Libvirt NUMA Tuning > vCPU Pinning